https://www.techworld-with-nana.com/devops-bootcamp
In modern software development, the outputs of our build processes - like JAR files, Docker images, ZIP archives, and more - are called artifacts. Managing these artifacts efficiently, especially in environments using CI/CD, is where an Artifact Repository Manager comes into play.
This post will cover what artifacts are, why we need a repository manager, and why Nexus is a powerful open-source choice. We'll also touch on installation tips, practical use cases, and viable alternatives.
What are Artifacts?
Artifacts are the resulting build outputs from our source code:
- Java apps ->
.jar,.war - Node/React apps ->
.zip,.tar - Docker containers -> Docker images
These outputs are reused, tested, deployed, and promoted across environments (e.g., dev -> staging -> production), so they need to be centrally managed.
What is an Artifact Repository Manager?
An Artifact Repository Manager is a tool that stores, versions, and retrieves artifacts. It allows you to:
- Publish builds in a traceable, repeatable manner.
- Integrate with CI/CD tools like Jenkins, GitHub Actions, or GitLab CI.
- Support multiple formats like Maven, Docker, NuGet, PyPI, and more.
- Control access (auth, roles) and audit changes.
Rather than having multiple repositories for different formats, one manager supports them all - acting as a central hub for our organization's software artifacts.
Public vs Private Repositories
- Public Repository: Hosted on platforms like Maven Central, Docker Hub, or npmjs.com. Great for open-source or shared dependencies.
- Private Repository: Internal to our company. Stores your own proprietary artifacts securely.
Why Nexus?
Nexus Repository OSS (by Sonatype) is one of the most popular open-source artifact managers. It's known for:
- ✅ Support for multiple formats (Maven, npm, NuGet, Docker, PyPI, etc.)
- ✅ Easy integration with LDAP and system users.
- ✅ REST API for automation.
- ✅ Metadata tagging, search, backup, and cleanup policies.
- ✅ Ability to host, proxy, and group repositories.
Nexus distinguishes between:
- Hosted Repos: Store your own internal packages.
- Proxy Repos: Cache packages from public repos.
- Group Repos: Aggregate several repos into one.
Nexus Alternatives
| Tool | Notes |
|---|---|
| JFrog Artifactory | Enterprise-grade, powerful, but commercial. Offers a free tier for small teams. |
| Harbor | CNCF project focused on Docker image management; great for container-heavy environments |
| GitHub Packages | Integrated with GitHub Actions; supports several formats but less flexible |
| AWS CodeArtifact | Managed service integrated with AWS IAM; pay-as-you-go |
| GitLab Package Registry | Integrated into GitLab; supports CI/CD out of the box |
Demo: Install and Run Nexus on a Cloud Server - Part 1
Summary of Steps
- Create Ubuntu Server (Droplet) - min 4GB RAM, 2 CPUs, 160GB SSD Disk
- Open SSH port 22
- Install Java 17
- Download and Install Nexus
- Create "nexus" user and group - Best Practice: Run applications with own user
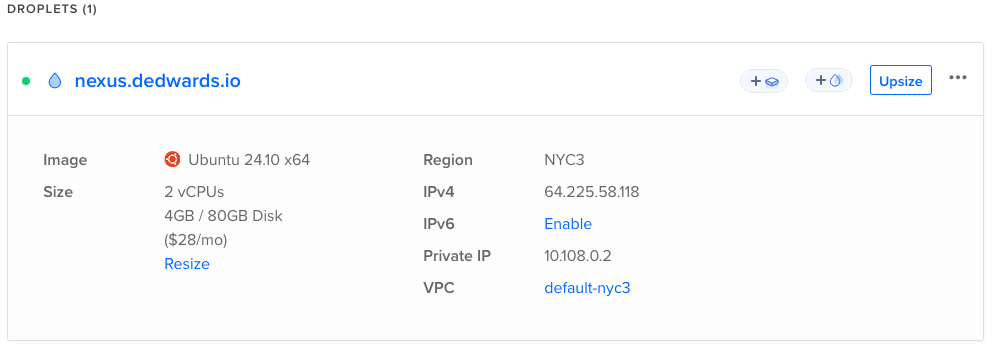
Create Ubuntu Server
- Following our first demo, Cloud Infrastructure as Service Basics, let's create a Droplet in DigitalOcean with the following specs:
- RAM: 4GB
- CPUs: 2
- Disk: 160GB
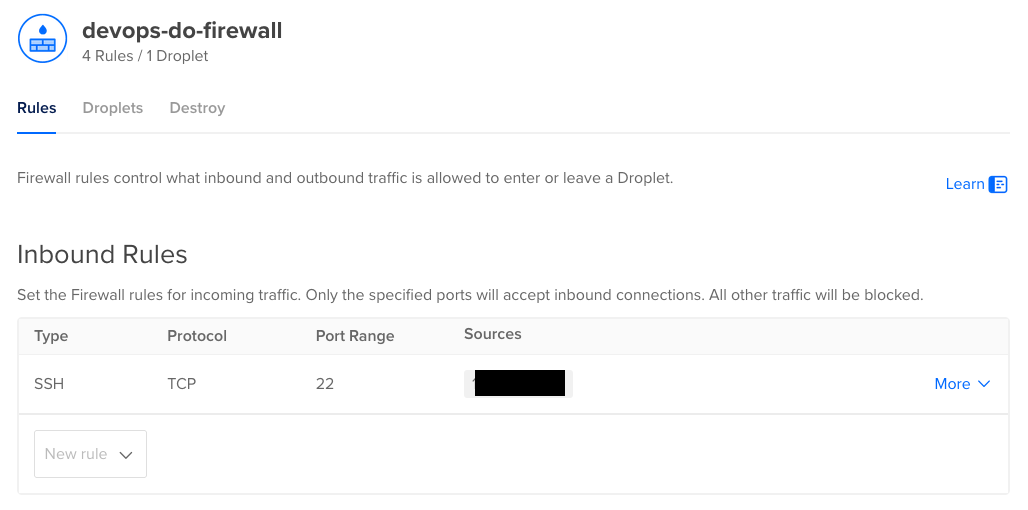
Open SSH port 22
- Following our first demo, Cloud Infrastructure as Service Basics, let's create a firewall, attach it to our new droplet, and allow SSH port 22 to our public IP address.
Install Java
Nexus Repository supports OpenJDK and requires Java 17.
- Update your Ubuntu server
apt-get update
apt-get upgrade -y- Install OpenJDK 17
apt-get install openjdk-17-jre -y- Check for a successful installation with
java -version

Download and Install Nexus
- Download Nexus Repository from the Sonatype website. We will download the one for Linux servers.
https://download.sonatype.com/nexus/3/nexus-3.82.0-08-linux-x86_64.tar.gz
cd /opt
wget https://download.sonatype.com/nexus/3/nexus-3.82.0-08-linux-x86_64.tar.gz- Extract the archive in the
/optdirectory.
tar xvz --keep-directory-symlink -f nexus-3.82.0-08-linux-x86_64.tar.gz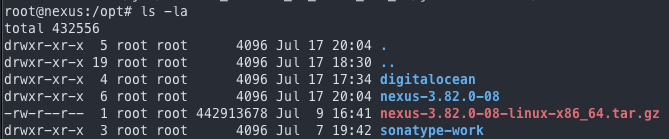
- Finally, let's create a new linux user that will own and run our Nexus installation.
adduser nexus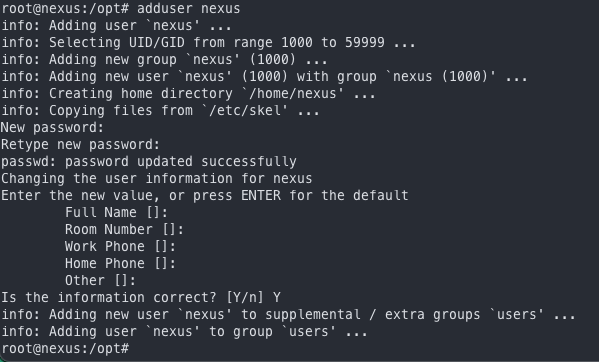
Demo: Install and Run Nexus on a Cloud Server - Part 2
Summary of Steps
- Make Nexus owner of the folders
- Start with nexus user
- Open port 8081 with firewall
- Access from browser
Make Nexus Owner of the Folders
- Let's now change ownership of our nexus installation path, and make the
nexususer the owner.
cd /opt
chown -R nexus:nexus nexus-3.82.0-08/
chown -R nexus:nexus sonatype-work/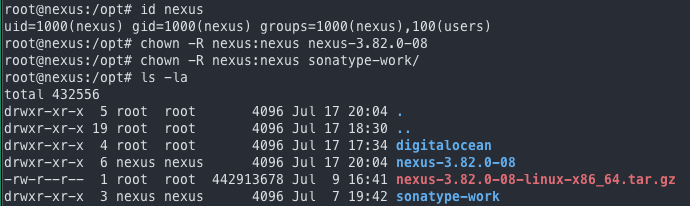
Start Nexus with nexus user
- Switch user to
nexus
su - nexus- Change directory to
/opt/nexus-3.82.0-08/bin
cd /opt/nexus-3.82.0-08/bin- Run
./nexus startto start Nexus with thenexususer.

Open port 8081
- Update your DigitalOcean firewall, and add a new ingress rule for port
8081to your public IP.

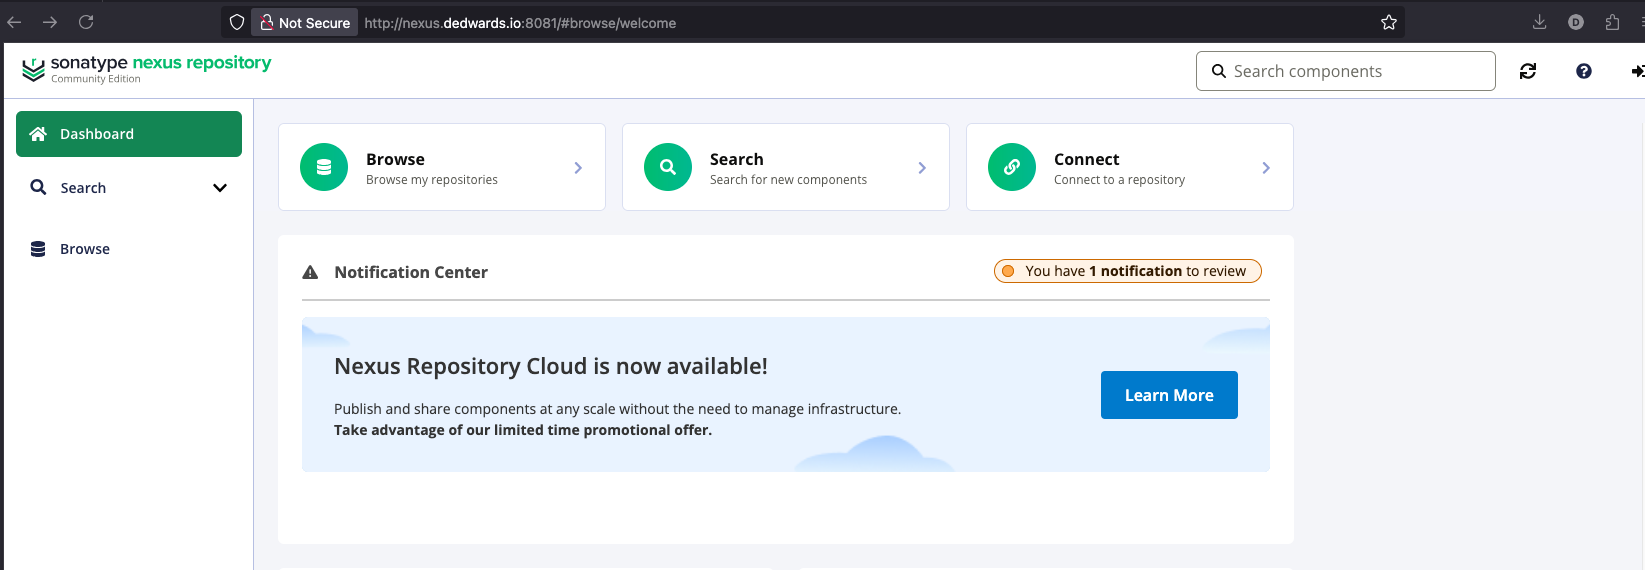
Access Nexus from Browser
- Open your favorite browser, and access our freshly installed Nexus Repository on
http://<droplet-ip-address>:8081
Demo: Install and Run Nexus on a Cloud Server - Part 3
Summary of Steps
- Login to Nexus for the First Time
- Create a Nexus User with Relevant Permissions
- Publish a Gradle Artifact
- Publish a Maven Artifact
- Setup Cleanup Policies
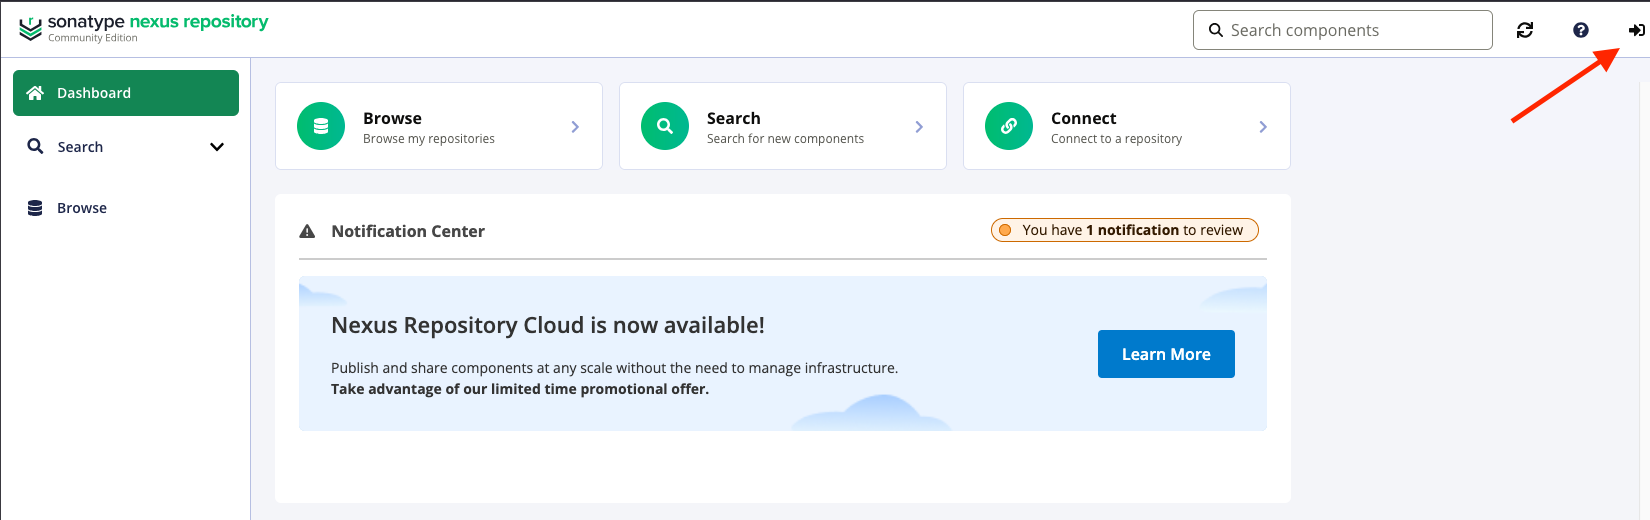
Login to Nexus for the First Time
- After opening Nexus on your browser, click on the top right-corner for login.
- Retrieve the password from the path displayed on the login box.
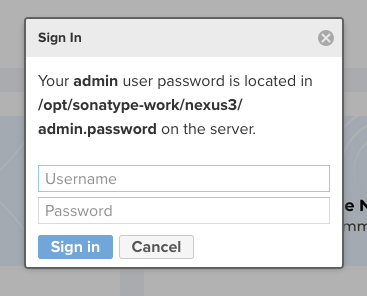
- Go through the Wizard and change your password.
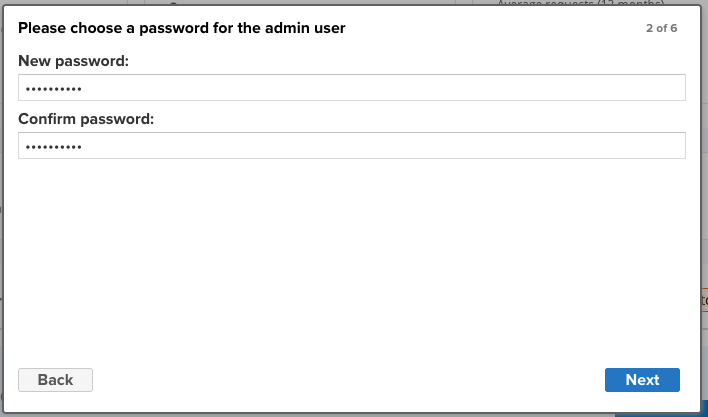
- Finish through the Wizard and disable Anonymous Access.

Create a Nexus User with Relevant Permissions
- Go to Settings -> Security -> Users and click on Create Local User.
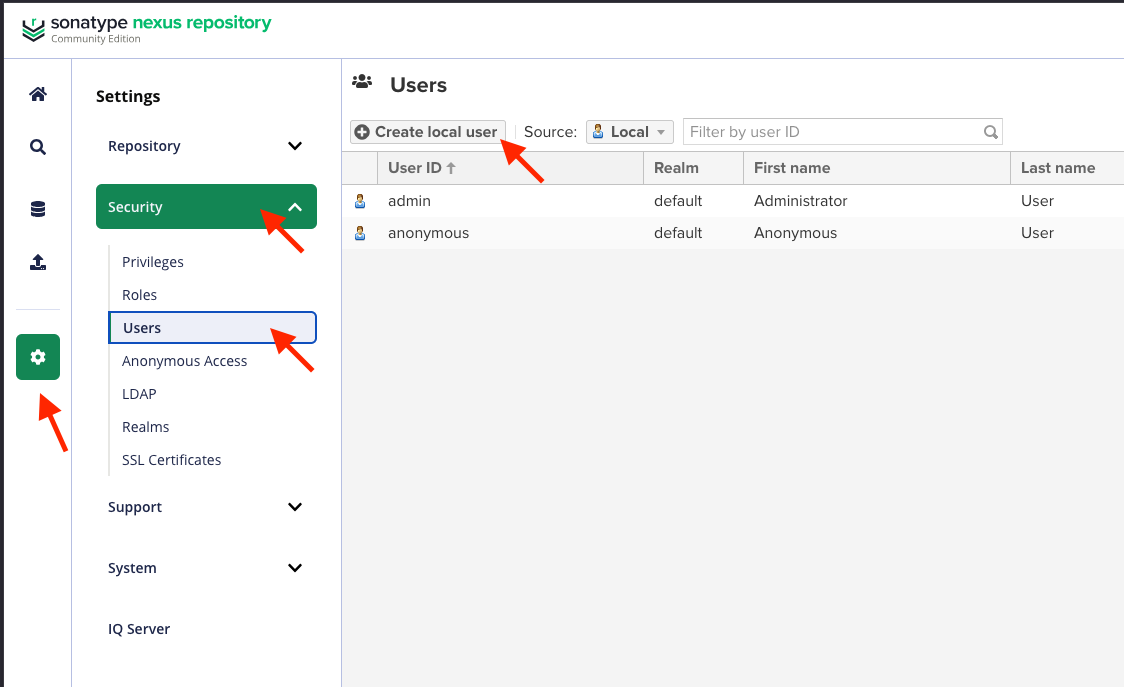
- Fill in the form, with:
- ID: username e.g.,
java - First Name
- Last Name
- Password
- Confirm Password
- Status: Active
- Roles: For now, nx-anonymous as we will create a new role.
- ID: username e.g.,
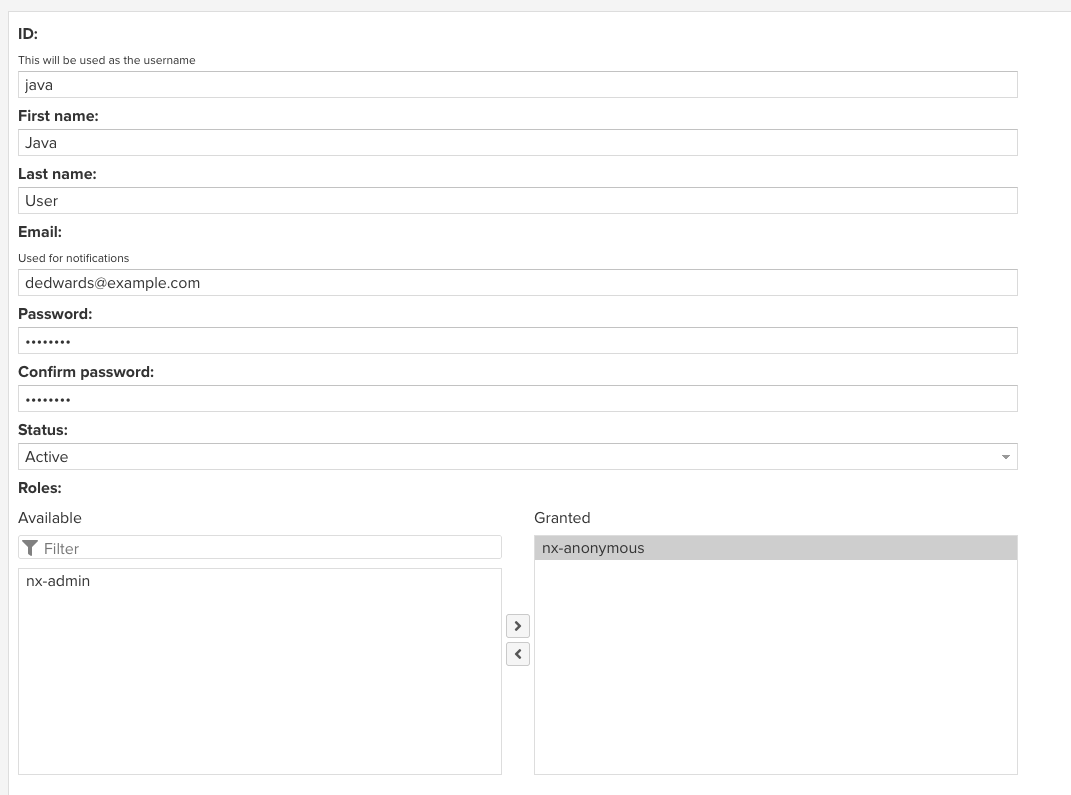
- Click on Create Local User at the bottom-right corner.

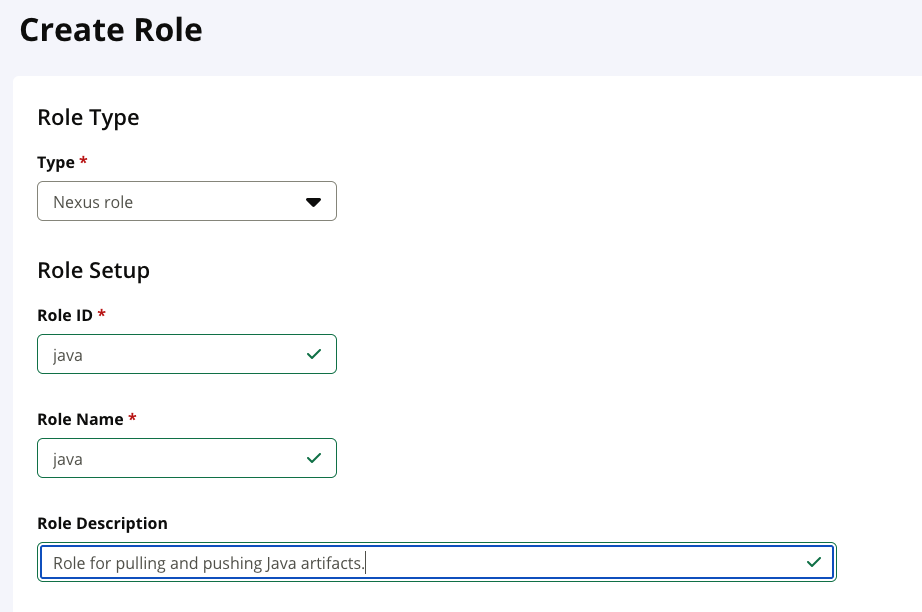
- On the left-side menu, click on Settings > Security > Roles and then, on the top-right corner, click on Create Role.
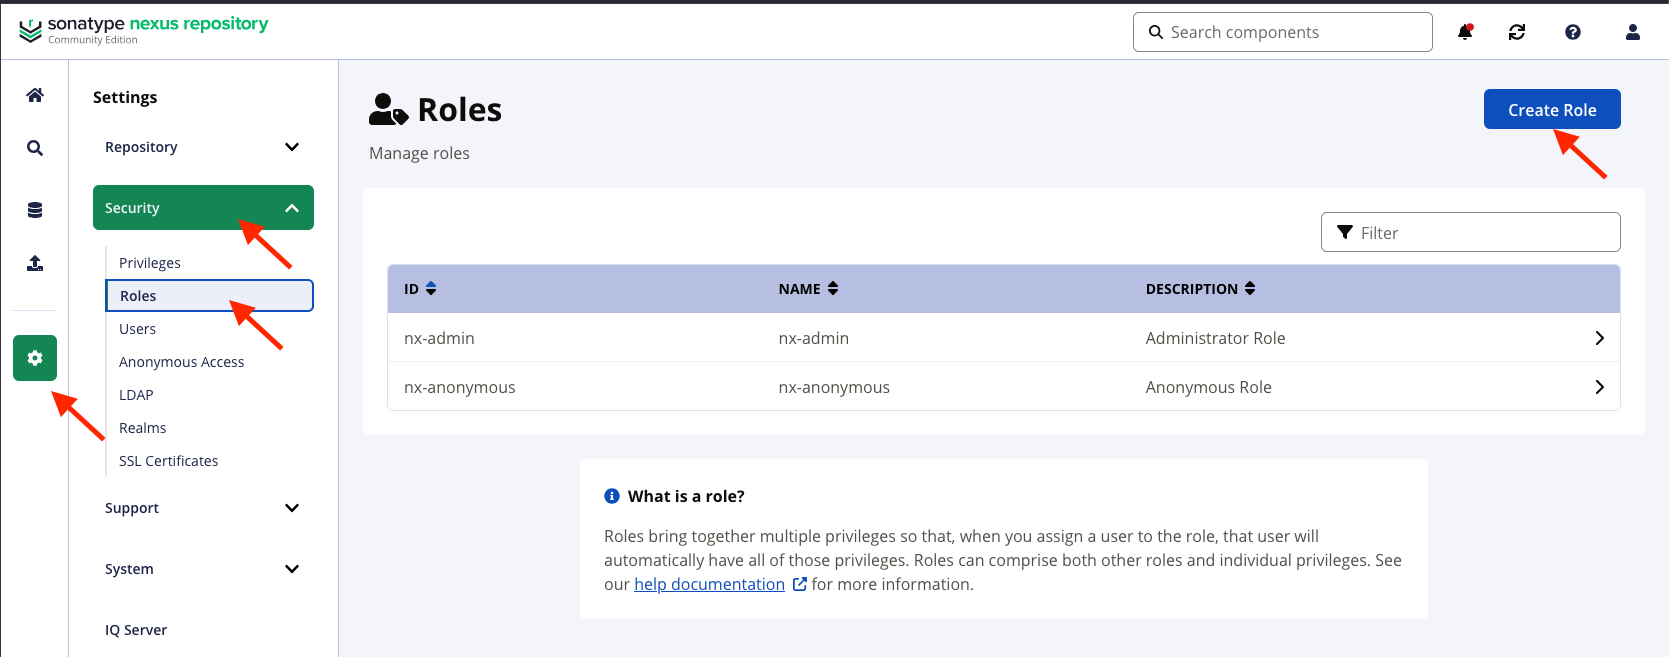
- Select Nexus Role from the drop-down in Type. Fill in the form on Role ID, Role Name, and optionally, add a Role Description.
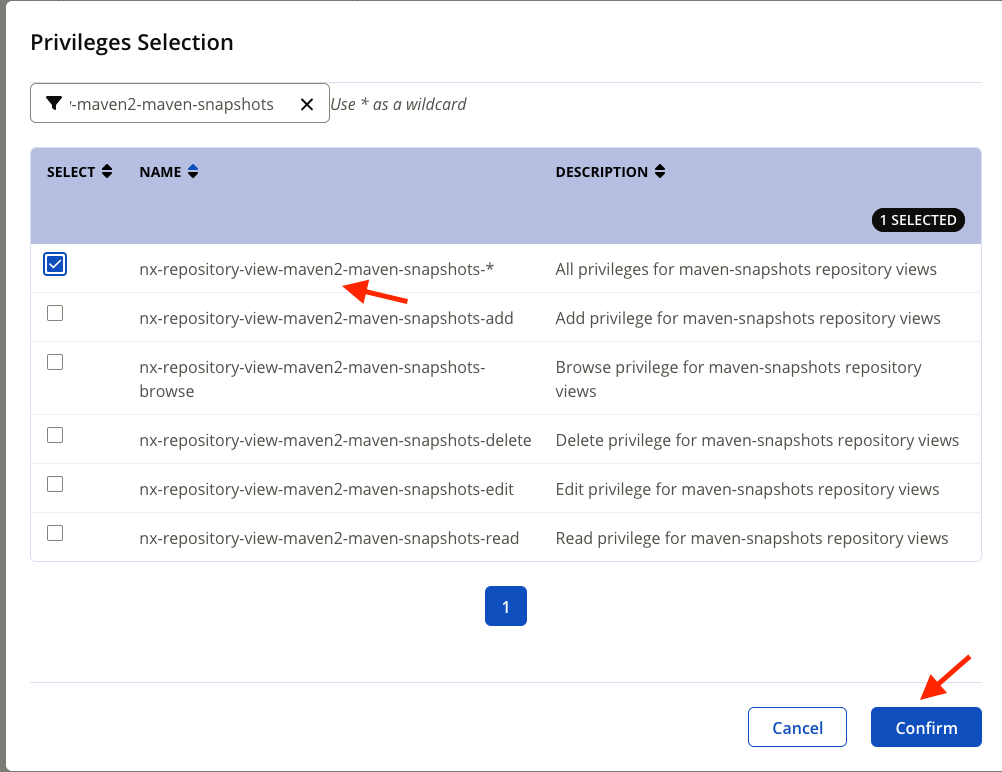
- Click on Modify Applied Privileges, and then search for
nx-repository-view-maven2-maven-snapshots-*, select it and Apply the privileges. Click on Save at the bottom-right corner.
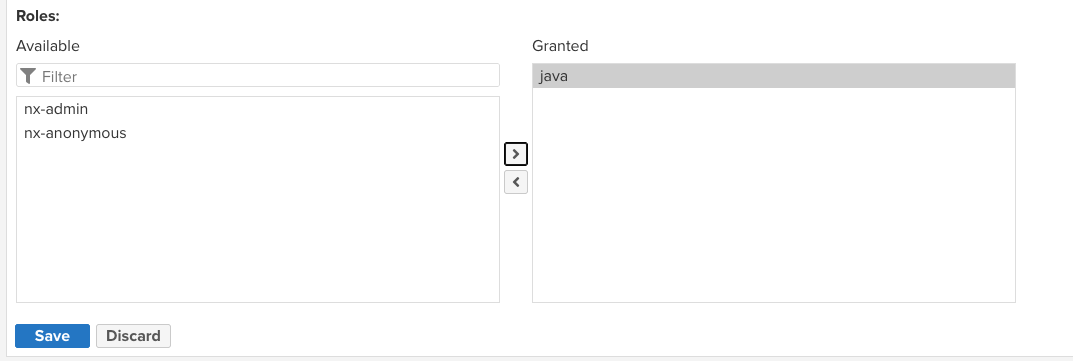
- Go back to Users, and click on the user you created. Under Roles, remove the
nx-anonymousand select the newly created role, in my case,java. Click on Save.

Publish a Gradle Artifact
- Clone the following repo: https://gitlab.com/twn-devops-bootcamp/latest/06-nexus/java-app
- Open
build.gradleand make sure the pluginmaven-publishis applied.
# settings.gradle
pluginManagement {
    repositories {
        maven { url 'https://repo.spring.io/milestone' }
        maven { url 'https://repo.spring.io/snapshot' }
        gradlePluginPortal()
    }
}
rootProject.name = 'my-app'

apply plugin: 'maven-publish'- Under
repositories, update themavenobject and point to your Nexus Repository.
repositories {
        maven {
            name 'nexus'
            url "http://xx.xx.xx.xx:xxxx/repository/maven-snapshots/"
            allowInsecureProtocol = true
            credentials {
                username project.repoUser
                password project.repoPassword
            }
        }
}- Update the
gradle.propertieswith your NexusrepoUserandrepoPassword
repoUser = java
repoPassword = javauser- Run
gradle build - Run
gradle publish
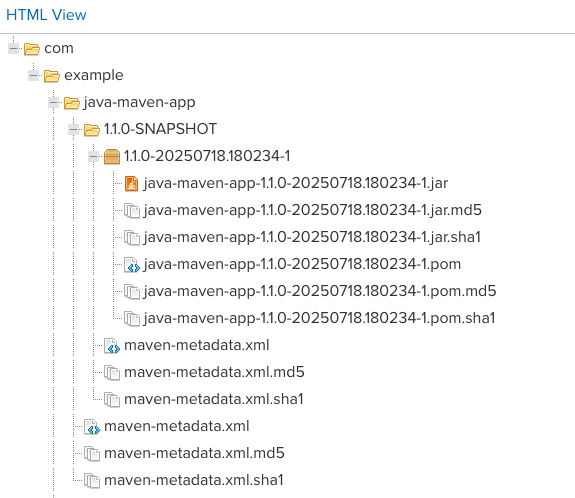
Publish a Maven Artifact
- Clone the following repo: https://gitlab.com/twn-devops-bootcamp/latest/06-nexus/java-maven-app
- Open the
pom.xmlfile. Under<plugins>add themaven-deploy-plugin
            <plugin>
                <groupId>org.apache.maven.plugins</groupId>
                <artifactId>maven-deploy-plugin</artifactId>
                <version>3.1.1</version>
</plugin>- Add
<distributionManagement>to thepom.xml
<distributionManagement>
        <snapshotRepository>
            <id>nexus-snapshots</id>
            <url>http://nexus.dedwards.io:8081/repository/maven-snapshots/</url>
        </snapshotRepository>
</distributionManagement>- Configure credentials for Maven in
~/.m2/settings.xml
# ~/.m2/settings.xml
<settings>
  <servers>
    <server>
      <id>nexus-snapshots</id>
      <username>java</username>
      <password>javauser</password>
    </server>
  </servers>
</settings>- Compile and Build the app.
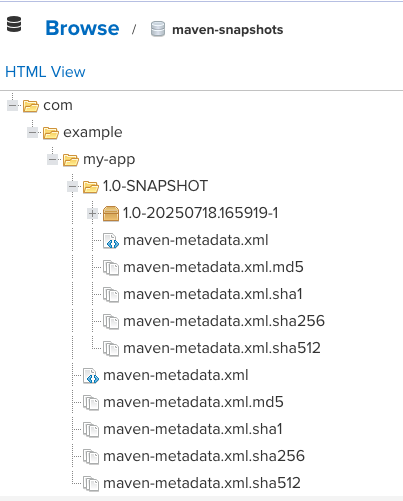
mvn package - Deploy and push the artifact
mvn deploy
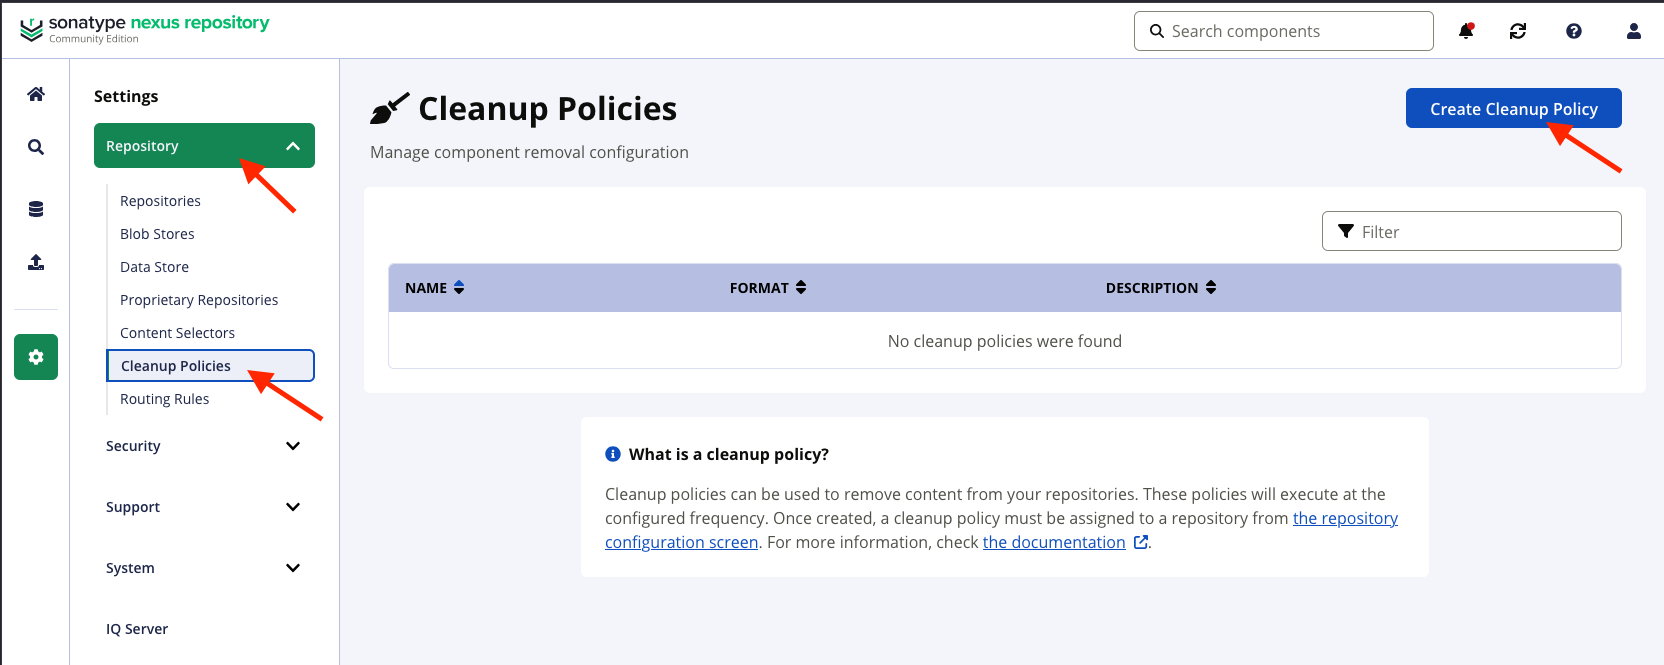
Setup a Cleanup Policy
- On the left-side menu, click on Settings > Repository > Cleanup Policies. Then, click on Create Cleanup Policy on the top-left button.
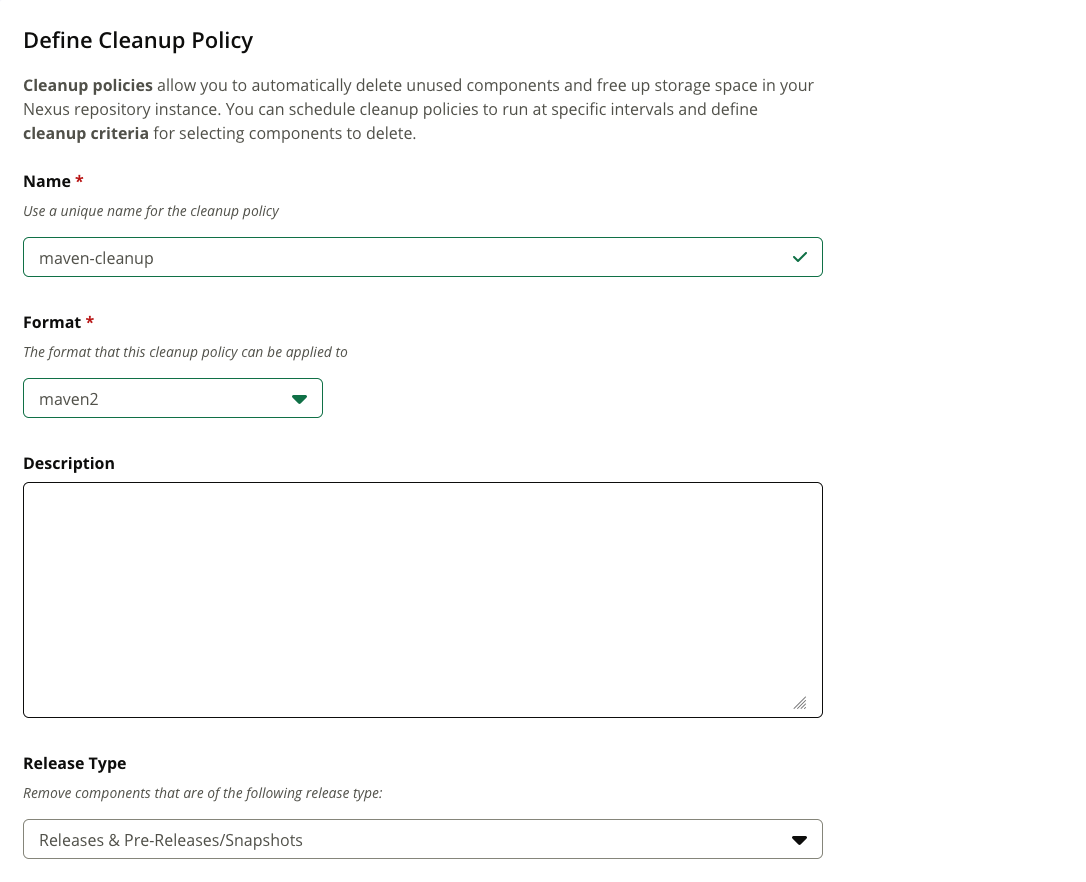
- Add a Name for the policy, and select the Format Type (e.g., maven2). Select the Release Type you want to apply the cleanup policy against.
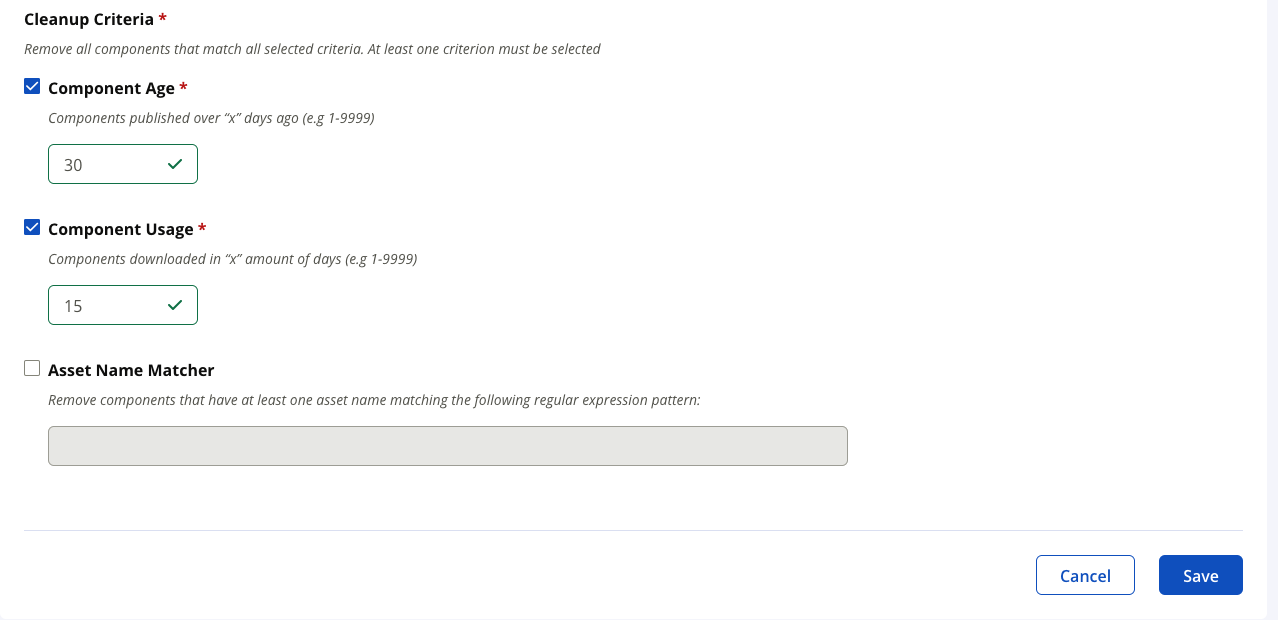
- Add the Cleanup Criteria based on Component Age and Component Usage. Click Save.
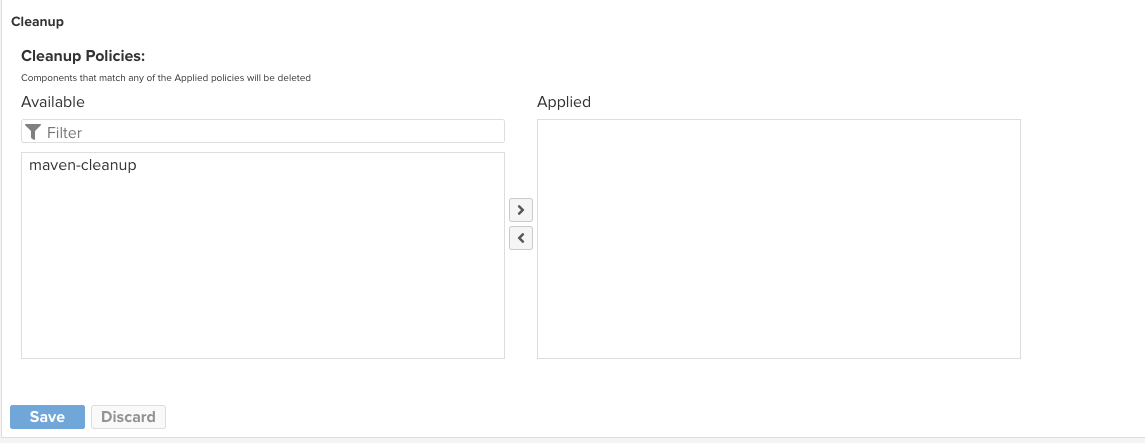
- Go back to Settings > Repository > Repositories and select the repository that you want to apply the policy to.
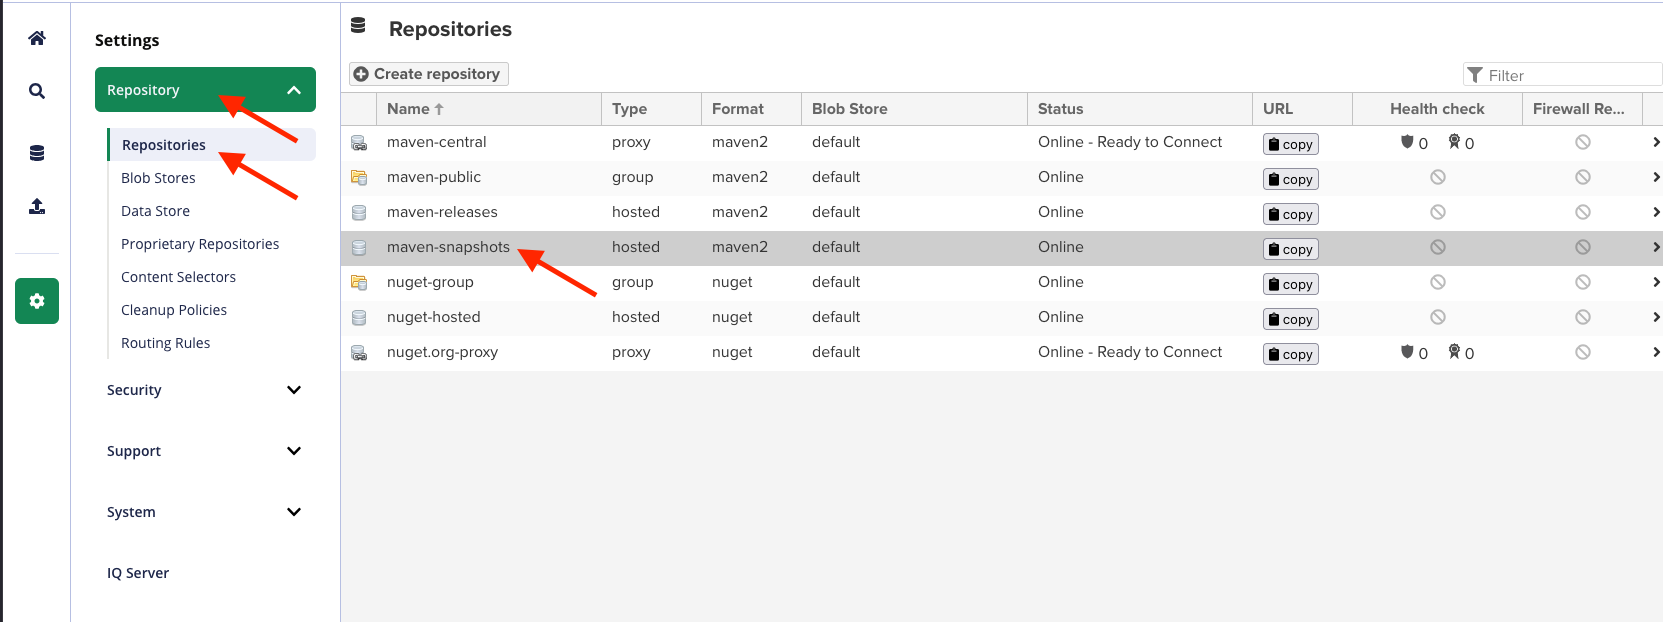
- Select the new Cleanup Policy and Save.
Conclusion
Using an artifact repository manager like Nexus improves your software. lifecycle by making artifacts traceable, secure, and readily accessible. Whether we are deploying a microservice or packaging a CLI tool, storing our artifacts properly is critical for modern DevOps.